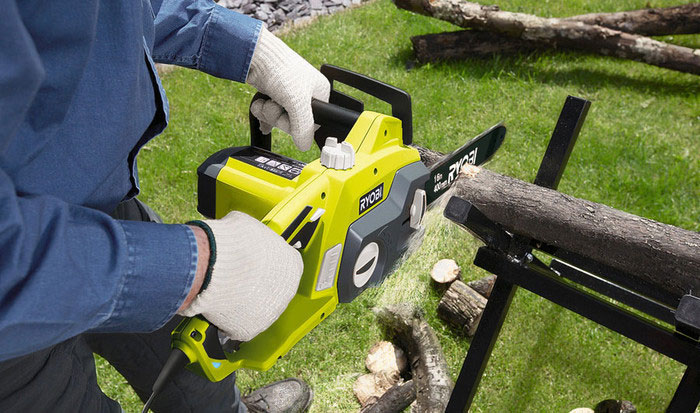
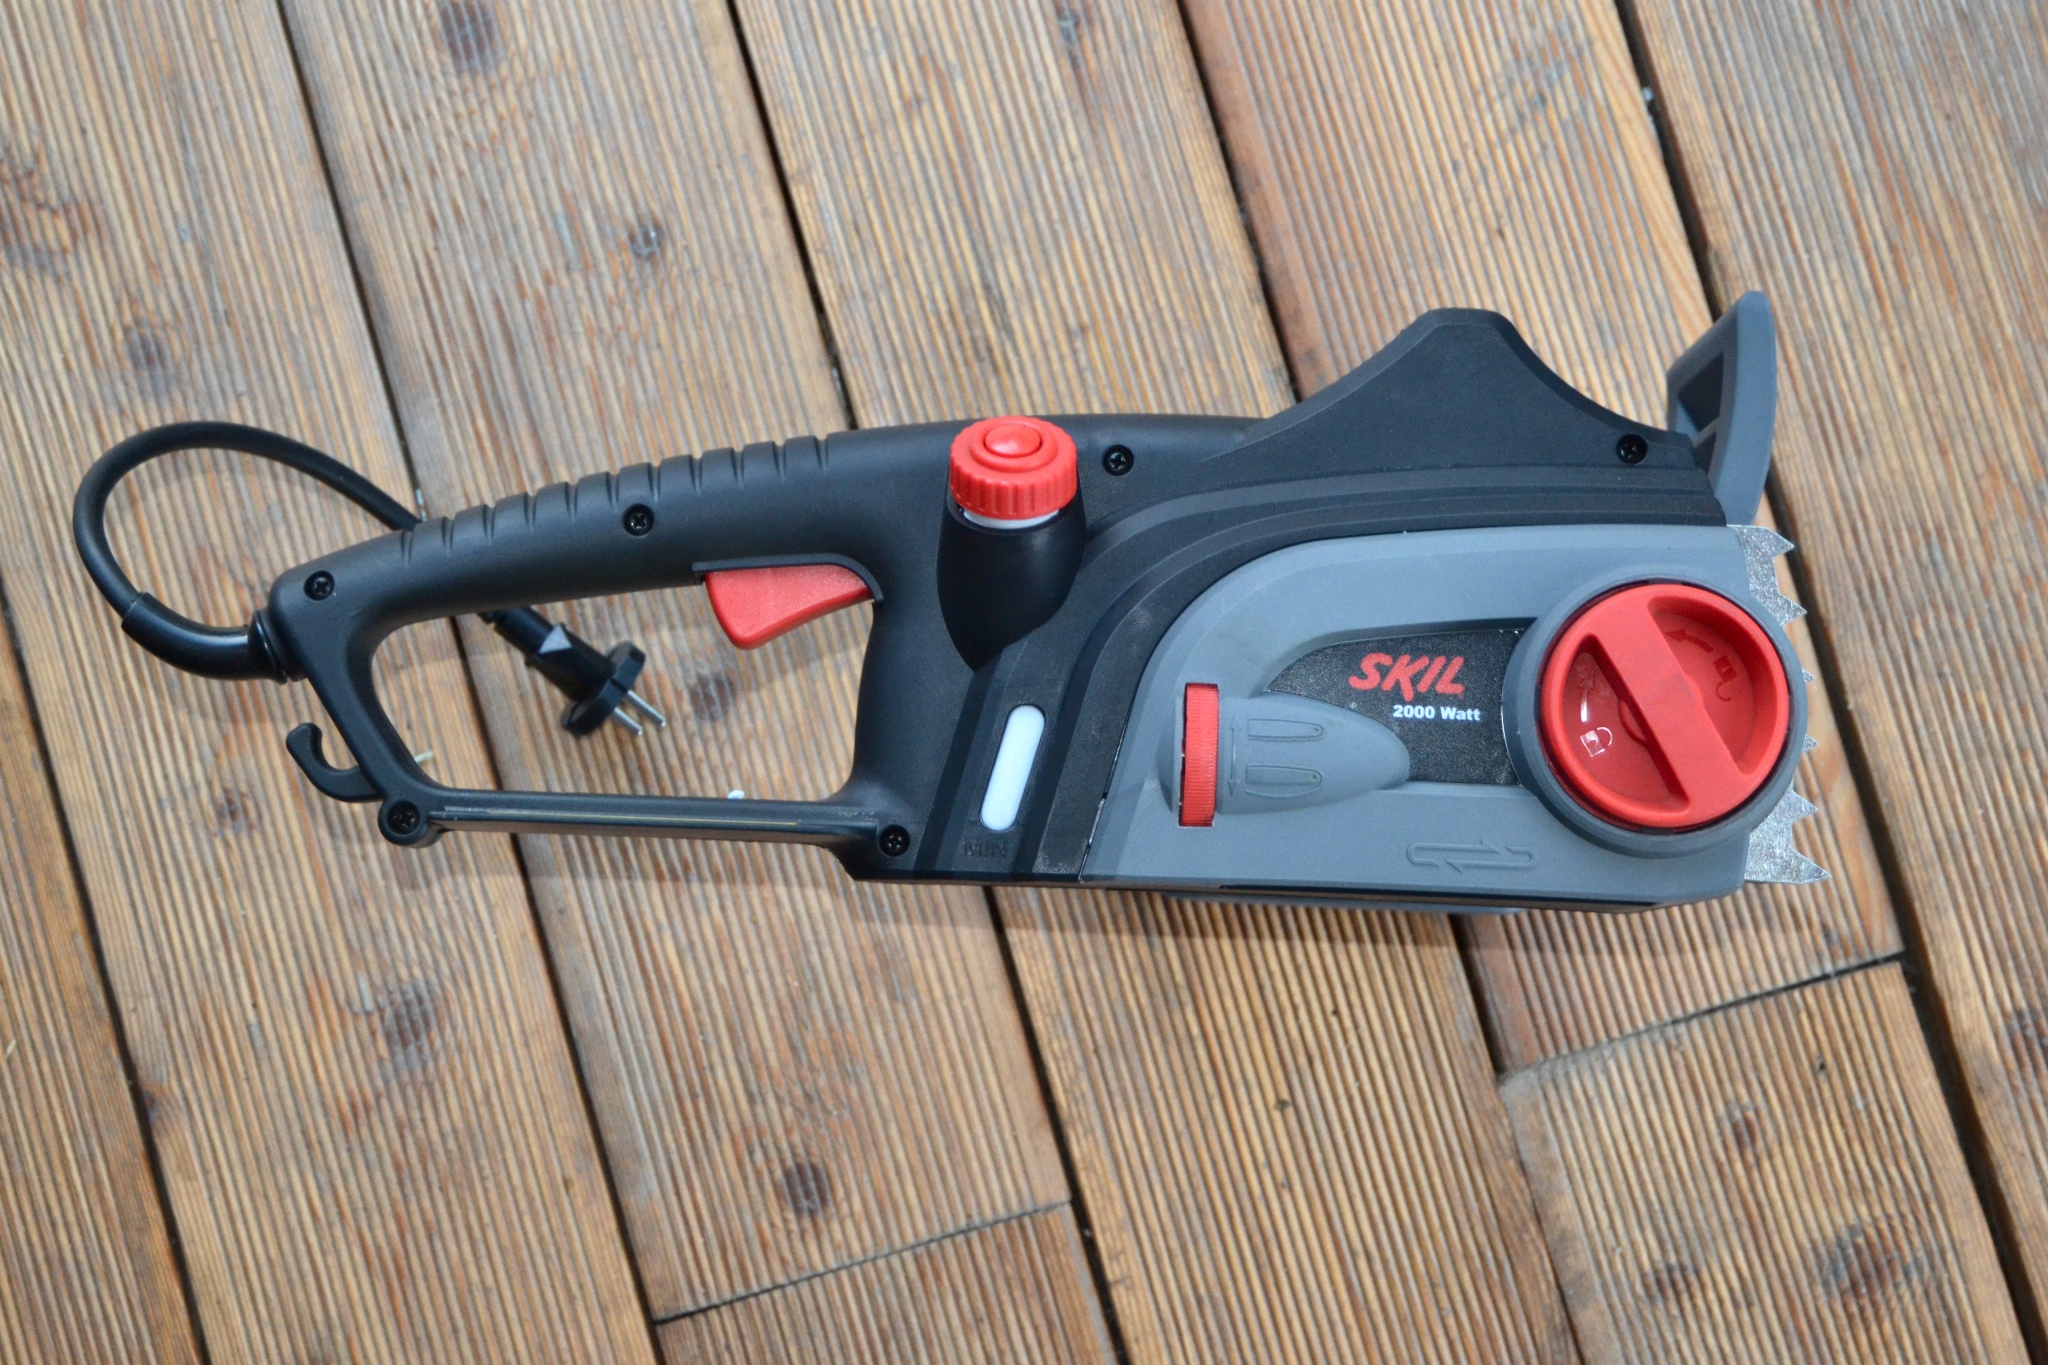
Плюсы электрической пилы
- За час работы, у бензопилы Лесник уходит примерно 400мл бензина. Т.е. 20 рублей в час. Электропила примерно аналогичной мощности, при местных тарифах, потребляет электричества на 6 рублей в час.
- Меньше шума и отсутствие выхлопных газов. Это возможность работать в закрытых помещениях.
- Нет необходимости ездить 30км на АЗС.
- Не нужно предварительно смешивать топливо с маслом для двигателя. Воткнул в розетку и приступил к работе.
- Электрический двигатель меньше нуждается в ремонте и обслуживании.
- Сокращается вероятность возгорания при работе с топливом.
Прикинув плюсы и минусы, учитывая наличие бензопилы (надеюсь рано или поздно удастся купить новую пружину), было принято решение брать именно электрическое устройство.
Не обращайте внимания на особенности перевода на сайте Леруа
Wheel and axle
The wheel is considered to be one of the most significant inventions in the history of the world. “Before , humans were severely limited in how much stuff we could transport over land, and how far,” wrote Natalie Wolchover in the Live Science article “Top 10 Inventions that Changed the World.” “Wheeled carts facilitated agriculture and commerce by enabling the transportation of goods to and from markets, as well as easing the burdens of people traveling great distances.”
The wheel greatly reduces the friction encountered when an object is moved over a surface. “If you put your file cabinet on a small cart with wheels, you can greatly reduce the force you need to apply to move the cabinet with constant speed,” according to the University of Tennessee.
In his book “Ancient Science: Prehistory-A.D. 500” (Gareth Stevens, 2010), Charlie Samuels writes, “In parts of the world, heavy objects such as rocks and boats were moved using log rollers. As the object moved forward, rollers were taken from behind and replaced in front.” This was the first step in the development of the wheel.
The great innovation, though, was in mounting a wheel on an axle. The wheel could be attached to an axle that was supported by a bearing, or it could be made to turn freely about the axle. This led to the development of carts, wagons and chariots. According to Samuels, archaeologists use the development of a wheel that rotates on an axle as an indicator of a relatively advanced civilization. The earliest evidence of wheels on axles is from about 3200 B.C. by the Sumerians. The Chinese independently invented the wheel in 2800 B.C.
Force multipliers
In addition to reducing friction, a wheel and axle can also serve as a force multiplier, . If a wheel is attached to an axle, and a force is used to turn the wheel, the rotational force, or torque, on the axle is much greater than the force applied to the rim of the wheel. Alternatively, a long handle can be attached to the axle to achieve a similar effect.
The other five machines all help humans increase and/or redirect the force applied to an object. In their book “Moving Big Things” (It’s about time, 2009), Janet L. Kolodner and her co-authors write, “Machines provide mechanical advantage to assist in moving objects. Mechanical advantage is the trade-off between force and distance.” In the following discussion of the simple machines that increase the force applied to their input, we will neglect the force of friction, because in most of these cases, the frictional force is very small compared to the input and output forces involved.
When a force is applied over a distance, it produces work. Mathematically, this is expressed as W = F × D. For example, to lift an object, we must do work to overcome the force due to gravity and move the object upward. To lift an object that is twice as heavy, it takes twice as much work to lift it the same distance. It also takes twice as much work to lift the same object twice as far. As indicated by the math, the main benefit of machines is that they allow us to do the same amount of work by applying a smaller amount of force over a greater distance.
A seesaw is an example of a lever. It’s a long beam balanced on a pivot. (Image credit: BestPhotoStudio Shutterstock)
Three components of machine learning
Without all the AI-bullshit, the only goal of machine learning is to predict results based on incoming data. That’s it. All ML tasks can be represented this way, or it’s not an ML problem from the beginning.
The greater variety in the samples you have, the easier it is to find relevant patterns and predict the result. Therefore, we need three components to teach the machine:
Data Want to detect spam? Get samples of spam messages. Want to forecast stocks? Find the price history. Want to find out user preferences? Parse their activities on Facebook (no, Mark, stop collecting it, enough!). The more diverse the data, the better the result. Tens of thousands of rows is the bare minimum for the desperate ones.
There are two main ways to get the data — manual and automatic. Manually collected data contains far fewer errors but takes more time to collect — that makes it more expensive in general.
Automatic approach is cheaper — you’re gathering everything you can find and hope for the best.
Some smart asses like Google use their own customers to label data for them for free. Remember ReCaptcha which forces you to “Select all street signs”? That’s exactly what they’re doing. Free labour! Nice. In their place, I’d start to show captcha more and more. Oh, wait…
It’s extremely tough to collect a good collection of data (usually called a dataset). They are so important that companies may even reveal their algorithms, but rarely datasets.
Features Also known as parameters or variables. Those could be car mileage, user’s gender, stock price, word frequency in the text. In other words, these are the factors for a machine to look at.
When data stored in tables it’s simple — features are column names. But what are they if you have 100 Gb of cat pics? We cannot consider each pixel as a feature. That’s why selecting the right features usually takes way longer than all the other ML parts. That’s also the main source of errors. Meatbags are always subjective. They choose only features they like or find “more important”. Please, avoid being human.
Algorithms Most obvious part. Any problem can be solved differently. The method you choose affects the precision, performance, and size of the final model. There is one important nuance though: if the data is crappy, even the best algorithm won’t help. Sometimes it’s referred as “garbage in – garbage out”. So don’t pay too much attention to the percentage of accuracy, try to acquire more data first.
Inclined Planes

An inclined plane is exactly what its name says. It’s a plane that is inclined, or in other words, slanted. This simple machine connects a lower level to a higher level, making it easy to move objects. The slanting surface supports some weight of an object as it moving upwards, making it utilize less force. However, the object must move at a longer distance than it would on a straight surface. An object will use less force to move upward in an inclined plane with a more gradual slope.


One of the most common applications of inclined planes is getting heavy objects into a truck using a ramp. Less force is required to get the object inside of the vehicle, the tradeoff being covering a longer distance.
Other types of inclined planes include:
- Wheelchair ramp
- Slide
- Slanted roof
Pulley
If we want to lift that same 100-lb. weight with a rope, we could attach a pulley to a beam above the weight. This would let us pull down instead of up on the rope, but it still requires 100 lbs. of force. However, if we were to use two pulleys — one attached to the overhead beam, and the other attached to the weight — and we were to attach one end of the rope to the beam, run it through the pulley on the weight and then through the pulley on the beam, we would only have to pull on the rope with 50 lbs. of force to lift the weight, although we would have to pull the rope 4 feet to lift the weight 2 feet. Again, we have traded increased distance for decreased force.
If we want to use even less force over an even greater distance, we can use a block and tackle. According to course materials from the University of South Carolina, “A block and tackle is a combination of pulleys which reduces the amount of force required to lift something. The trade-off is that a longer length of rope is required for a block and tackle to move something the same distance.”
As simple as pulleys are, they are still finding use in the most advanced new machines. For example, , a 3D printer that can build furniture-sized objects, employs a system of wires and computer-controlled pulleys anchored to the walls, floor, and ceiling.
Wedges

A wedge is a simple machine made of two inclined planes and greatly resembles an inclined plane or a ramp. One of its ends is usually thick, while the other one is sharp. Wedges make work easier by increasing the distance over which an object moves while decreasing force. Longer edges make work easier than shorter ones since they have an extra mechanical advantage. Wedges are used for different purposes such as cutting, holding together, and tightening objects.
Human beings have been using wedges for millions of years ago. In ancient times, people would use them for hunting, cutting trees, and carving stones. The ax is also one of the ancient wedges made by man. One of the applications of wedges in real life is modern cars and jets. They usually have pointed front parts that help them cut through the air with less resistance. There are two types of wedges. These are the single and double wedges.
- Single wedge
- Double wedge
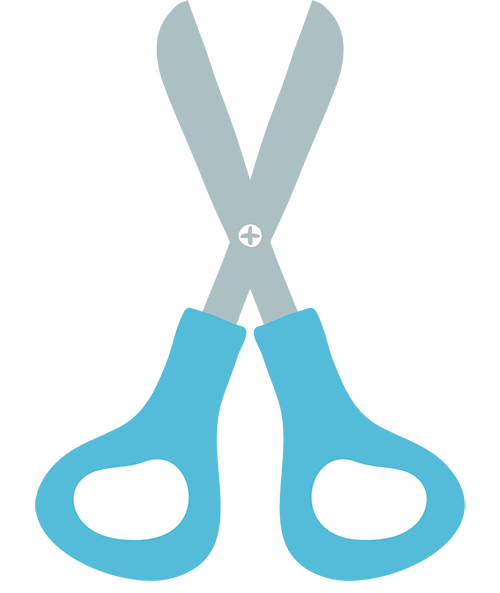
Examples of wedges include axes, chainsaws, knives, and scissors.
Lever
This boastful claim is attributed to the third-century Greek philosopher, mathematician and inventor Archimedes. While it may be a bit of an exaggeration, it does express the power of leverage, which, at least figuratively, moves the world.
The genius of Archimedes was to realize that in order to accomplish the same amount or work, one could make a trade-off between force and distance using a lever. His Law of the Lever states, “Magnitudes are in equilibrium at distances reciprocally proportional to their weights,” according to “Archimedes in the 21st Century,” a virtual book by Chris Rorres at New York University.
The lever consists of a long beam and a fulcrum, or pivot. The mechanical advantage of the lever depends on the ratio of the lengths of the beam on either side of the fulcrum.
For example, say we want to lift a 100-lb. (45 kilograms) weight 2 feet (61 centimeters) off the ground. We can exert 100 lbs. of force on the weight in the upward direction for a distance of 2 feet , and we have done 200 pound-feet (271 Newton-meters) of work. However, if we were to use a 30-foot (9 m) lever with one end under the weight and a 1-foot (30.5 cm) fulcrum placed under the beam 10 feet (3 m) from the weight, we would only have to push down on the other end with 50 lbs. (23 kg) of force to lift the weight. However, we would have to push the end of the lever down 4 feet (1.2 m) in order to lift the weight 2 feet. We have made a trade-off in which we doubled the distance we had to move the lever, but we decreased the needed force by half in order to do the same amount of work.
Force multipliers
In addition to reducing friction, a wheel and axle can also serve as a force multiplier, . If a wheel is attached to an axle, and a force is used to turn the wheel, the rotational force, or torque, on the axle is much greater than the force applied to the rim of the wheel. Alternatively, a long handle can be attached to the axle to achieve a similar effect.
The other five machines all help humans increase and/or redirect the force applied to an object. In their book “Moving Big Things” (It’s about time, 2009), Janet L. Kolodner and her co-authors write, “Machines provide mechanical advantage to assist in moving objects. Mechanical advantage is the trade-off between force and distance.” In the following discussion of the simple machines that increase the force applied to their input, we will neglect the force of friction, because in most of these cases, the frictional force is very small compared to the input and output forces involved.
When a force is applied over a distance, it produces work. Mathematically, this is expressed as W = F × D. For example, to lift an object, we must do work to overcome the force due to gravity and move the object upward. To lift an object that is twice as heavy, it takes twice as much work to lift it the same distance. It also takes twice as much work to lift the same object twice as far. As indicated by the math, the main benefit of machines is that they allow us to do the same amount of work by applying a smaller amount of force over a greater distance.
A seesaw is an example of a lever. It’s a long beam balanced on a pivot. (Image credit: BestPhotoStudio Shutterstock)
Inclined Planes

An inclined plane is exactly what its name says. It’s a plane that is inclined, or in other words, slanted. This simple machine connects a lower level to a higher level, making it easy to move objects. The slanting surface supports some weight of an object as it moving upwards, making it utilize less force. However, the object must move at a longer distance than it would on a straight surface. An object will use less force to move upward in an inclined plane with a more gradual slope.
One of the most common applications of inclined planes is getting heavy objects into a truck using a ramp. Less force is required to get the object inside of the vehicle, the tradeoff being covering a longer distance.
Other types of inclined planes include:
- Wheelchair ramp
- Slide
- Slanted roof
Classes of Lever Simple Machine
The position of the three points, namely, force, load, and the fulcrum, is responsible to decide the class of the lever. The following are the three classes of a lever simple machine:
1. First Class
In this class of the lever, the fulcrum is located in the middle of the plane. The force is applied at one end of the plane, whereas the load is kept at the other end. For example, seesaw, scissors, plier, etc.


2. Second Class
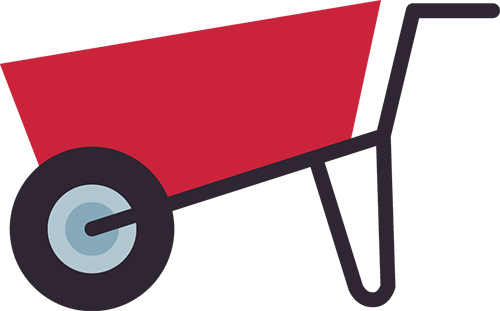
In the second class of lever, the load is present at the middle of the plane. The fulcrum is located at one end, whereas the force is applied at the opposite end. For example, wheelbarrow, nutcracker, stapler, etc.
3. Third Class
In the third class of lever, the fulcrum is present at one end of the beam and the load is present at the opposite end. The force is applied to the middle of the plane. For example, a hockey stick, hammer, rake, etc.
Wedges
A wedge is a simple machine made of two inclined planes and greatly resembles an inclined plane or a ramp. One of its ends is usually thick, while the other one is sharp. Wedges make work easier by increasing the distance over which an object moves while decreasing force. Longer edges make work easier than shorter ones since they have an extra mechanical advantage. Wedges are used for different purposes such as cutting, holding together, and tightening objects.
Human beings have been using wedges for millions of years ago. In ancient times, people would use them for hunting, cutting trees, and carving stones. The ax is also one of the ancient wedges made by man. One of the applications of wedges in real life is modern cars and jets. They usually have pointed front parts that help them cut through the air with less resistance. There are two types of wedges. These are the single and double wedges.
- Single wedge
- Double wedge
Examples of wedges include axes, chainsaws, knives, and scissors.
Classes of Lever Simple Machine
The position of the three points, namely, force, load, and the fulcrum, is responsible to decide the class of the lever. The following are the three classes of a lever simple machine:
1. First Class
In this class of the lever, the fulcrum is located in the middle of the plane. The force is applied at one end of the plane, whereas the load is kept at the other end. For example, seesaw, scissors, plier, etc.
2. Second Class
In the second class of lever, the load is present at the middle of the plane. The fulcrum is located at one end, whereas the force is applied at the opposite end. For example, wheelbarrow, nutcracker, stapler, etc.
3. Third Class
In the third class of lever, the fulcrum is present at one end of the beam and the load is present at the opposite end. The force is applied to the middle of the plane. For example, a hockey stick, hammer, rake, etc.
Fun Science for Kids
Looking for lots more fun, science experiments for kids? You’ve GOT to try some of these outrageously fun science experiments for kids! We have so many fun, creative and easy science experiments for elementary age children:
- 100 Amazing Food science experiments for kids – arranged by type of science
- Colorful Capillary action science experiment (also known as walking water)
- Lots of really cool dry ice experiments to try at home
- Amaze kids with these 12 Hands on Science experiments with batteries
- 24 Epic Solar system science projects to try this week
- Fun Water balloon science experiment that explores density
- 50 Fun Preschool science experiments the whole family will want to try
- Amazing, heat-sensitive color changing slime
- Simple Galaxy science project
- Easy and Fun Dancing Raisins Experiment
- Learn about weather as you find how to make a weather vane
- Eye opening Eye science experiments
- Easy-to- make Air pressure science project
- Amazing POP rocks science experiment is one of our all-time favorite science experiments we like to do during the summer are
- Stunning Chromatography Flowers are so pretty you’ll forget it was as science project!
- How to Make a Lava Lamp – super easy and SO cool!
- 30 Simple machines science projects kids will want to try
- Easy, fascinating, and colorful project answering Why do Leaves Change Color Experiment
- Free Printable Animal Classifications for Kids Cootie Catchers
- 19 Edible science experiments – which delicious project will you try first?
- HUGE Free Solar System Unit (coloring pages, hands on science projects, worksheets, and more!)
- Pipe Cleaner Constellation Activity (As seen on Good Housekeeping!)
- Teach kids about conductivity with this fun squishy circuits projects
- Amazing, Heat Sensitive, Color Changing Slime
- Life Cycles for Kids (from penguin to sunflower and spider to turkey we have LOTS of life cycles to explore and learn about)
- EASY, Colorful Oil and Water Science Experiment
- Kids will be amazed as you change colors of white flowers with this Dying Flowers Science Experiment
- This super cool Lego Zipline is fun and simple to make
- Human Body Project
- Check out this super cool look INSIDE a Volcano Project
- Exploding Watermelon – science experiment that explores potential and kinetic energy with a big WOW moment!
- Memorable Life Size Skeletal system science project – includes free printable template
- Find LOTS more Easy Science Experiments for kids of all ages!
- Money Math Games – lots of fun, clever, and FREE money games and activities for kids.
Looking for more fun, creative ways you can begin your free homeschool? We have over 1,000,000 pages of FREE Printable Worksheets including resources for: pre k worksheets, kindergarten worksheets, 1st grade worksheets, 2nd grade worksheets, 3rd grade worksheets, 4th grade worksheets, 5th grade worksheets, 6th grade worksheets, and more. Plus see our history lessons for kids, hands-on countries for kids, printable math games, language arts worksheets, sight word worksheets, free alphabet printables, and cvc word activities for kids of all ages!
Fun Science for Kids
Looking for lots more fun, science experiments for kids? You’ve GOT to try some of these outrageously fun science experiments for kids! We have so many fun, creative and easy science experiments for elementary age children:
- 100 Amazing Food science experiments for kids – arranged by type of science
- Colorful Capillary action science experiment (also known as walking water)
- Amaze kids with these 12 Hands on Science experiments with batteries
- 24 Epic Solar system science projects to try this week
- Fun Water balloon science experiment that explores density
- 50 Fun Preschool science experiments the whole family will want to try
- Simple Galaxy science project
- Easy and Fun Dancing Raisins Experiment
- Learn about weather as you find how to make a weather vane
- Eye opening Eye science experiments
- Easy-to- make Air pressure science project
- Amazing POP rocks science experiment is one of our all-time favorite science experiments we like to do during the summer are
- Stunning Chromatography Flowers are so pretty you’ll forget it was as science project!
- How to Make a Lava Lamp – super easy and SO cool!
- 30 Simple machines science projects kids will want to try
- Easy, fascinating, and colorful project answering Why do Leaves Change Color Experiment
Actions in SAP CRM Part 1: Action profiles and determination
Within SAP CRM, actions are pieces of logic that are related to a transaction. They are executed conditionally, either automatically or manually. Examples of actions are: sending out an order confirmation after saving the order, creating a follow-up task when a certain status has been set, or completing an order after a period of time. These actions are all available in the standard system, but you can easily create your own actions and assign them to your own pieces of logic (called: action method) and conditions. Besides giving a quick overview of what actions are about in this blog, I’d like to share some ‘expert’ tips and tricks that I’ve learned over the years, including action profile determination, a relatively new and little known functionality that was introduced in CRM 7.0. In this blog, I’ll focus on action profiles and action determination. In the next blog, you’ll read all about action conditions.
Action profiles
Actions are defined within an action profile, which in turn is linked to a transaction type or an item category (see also the next paragraph on determination). In the action, you can set up a number of parameters, including:
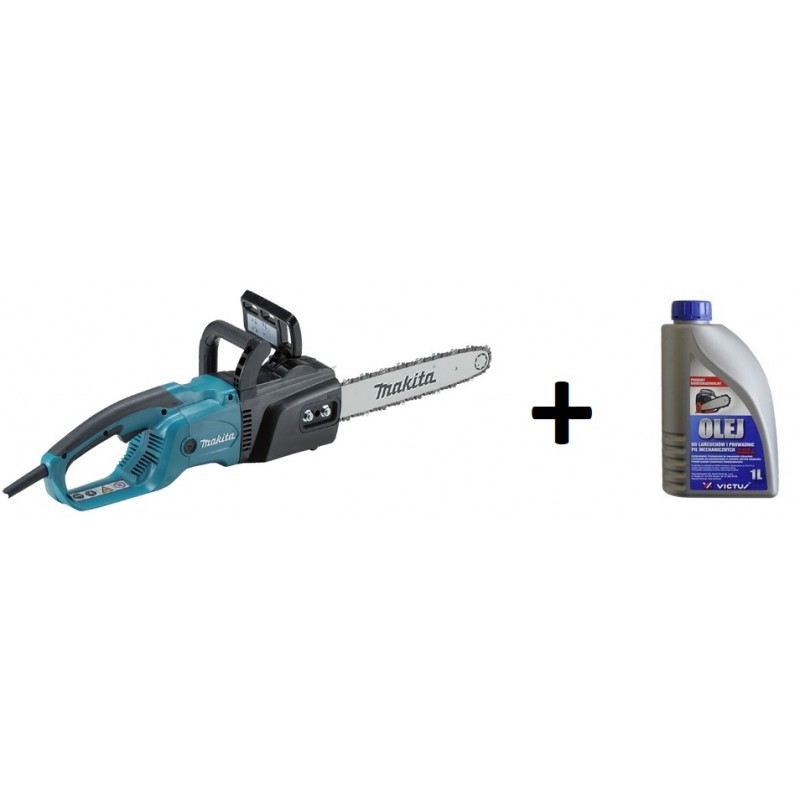
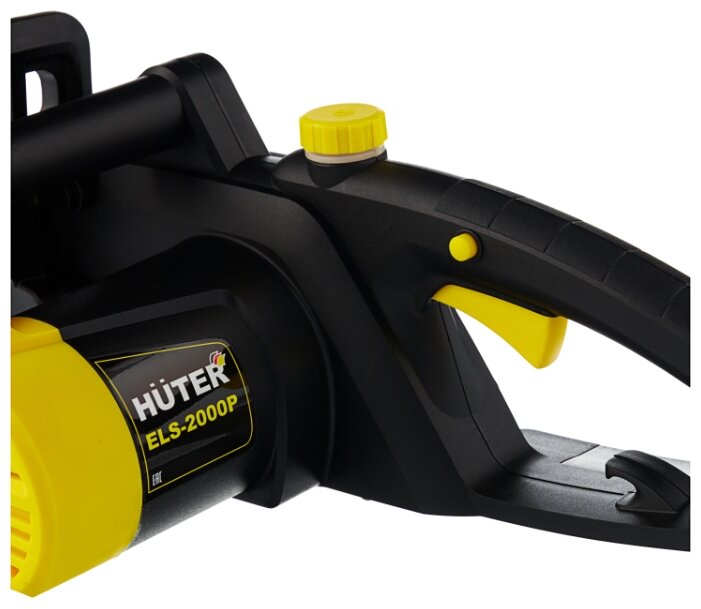
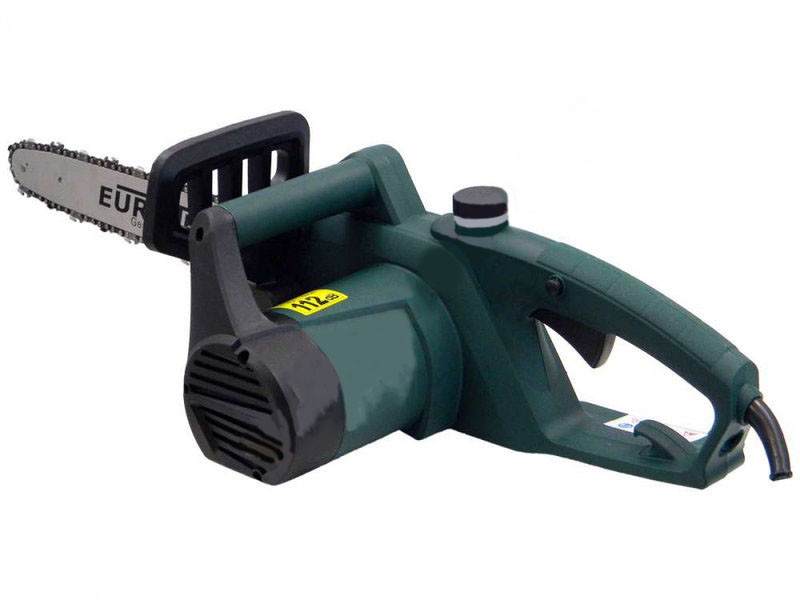
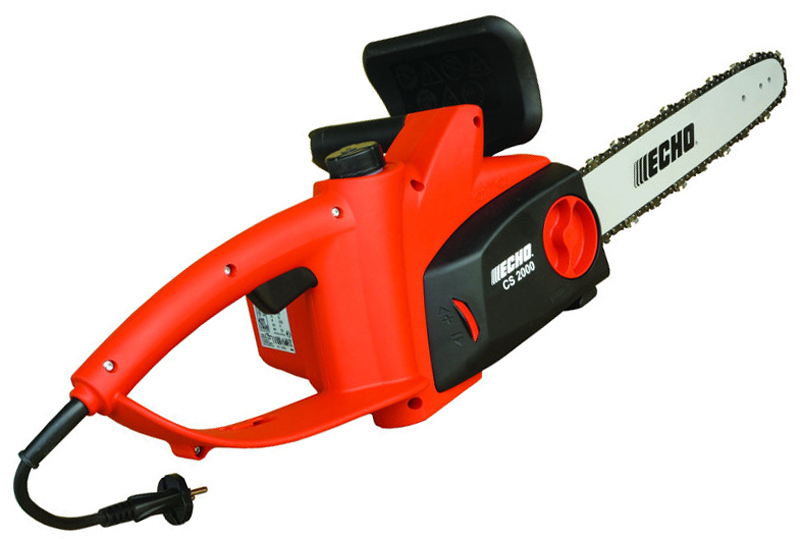
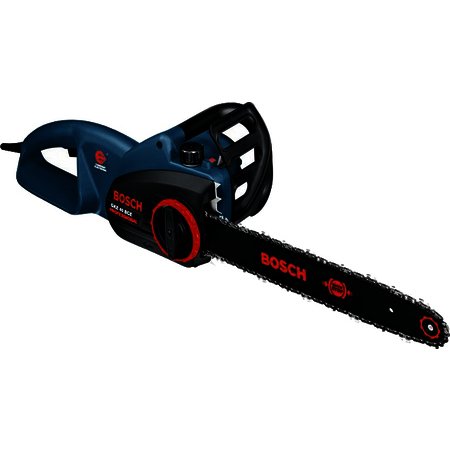
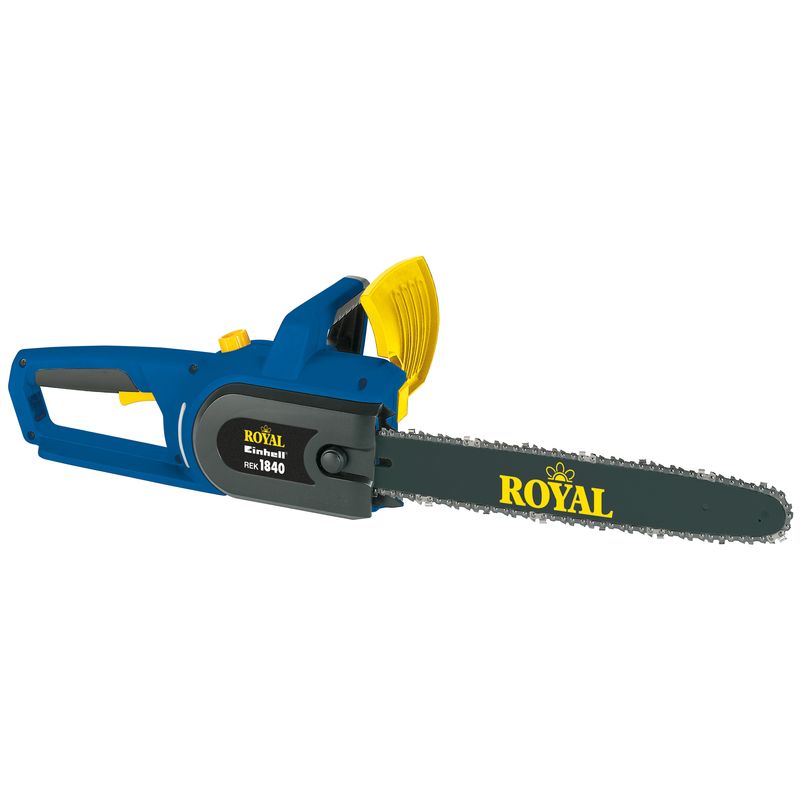
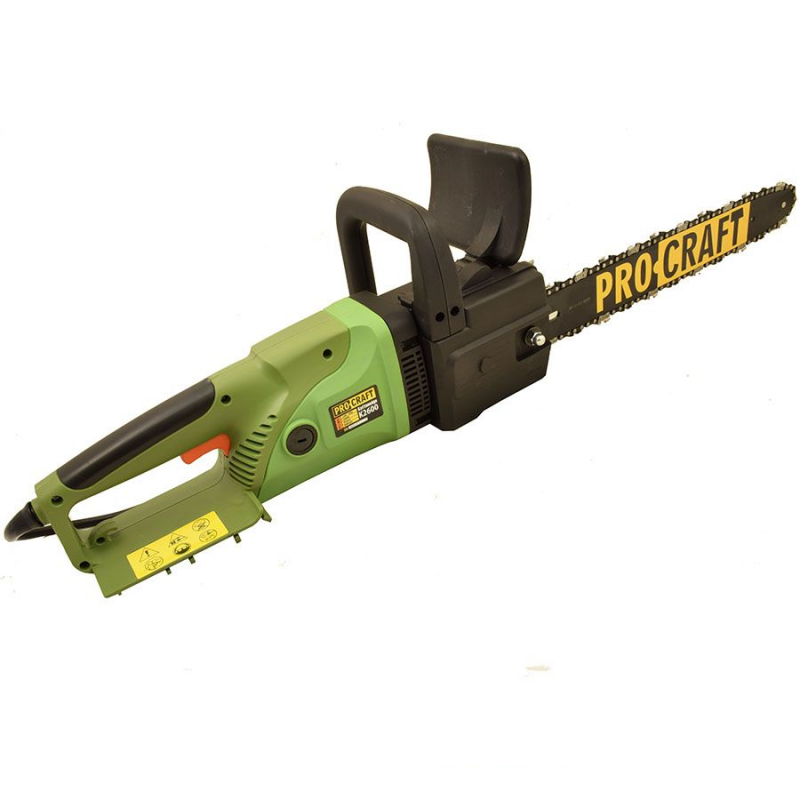
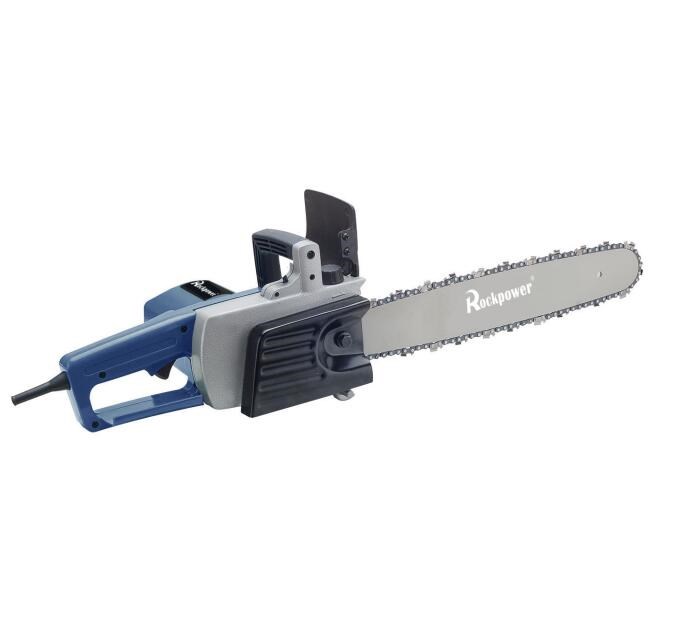
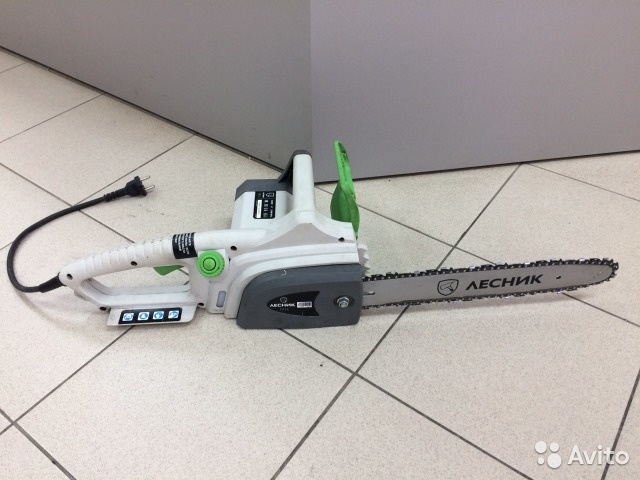
Сравнительная таблица моделей
Для более наглядного сравнения представленных выше моделей используем сравнительную таблицу характеристик.
| Модель | Напряжение (В) | Батарея (Ач) | Шум (дБ) | Вес (кг) | Цена (руб) |
| greenworks G40CS30 0 40 B | 40 | 2 | 97 | 3.6 | от 9 031 до 10 456 |
| Makita DUC302Z 18 B | 18 | 2 | 82 | 4.1 | от 12 843 до 14 541 |
| BOSCH UniversalChain 18 0 18 B | 18 | 2.5 | 87 | 2.7 | от 6 782 до 7 645 |
| Husqvarna 120i-12 36.5 B | 36 | 4 | 100 | 3 | от 17 689 до 19 942 |
| Makita DUC353Z 36 B | 18 | 2 | 79 | 4.7 | от 20 973 до 24 683 |
| Husqvarna 436 Li 36 B/3 Ач | 36 | 4.2 | 106 | 2.7 | от 15 965 до 18 023 |
| Worx WG322E. 9 0 коробка 20 B | 20 | 2 | 87 | 2.8 | от 7 894 до 9 237 |
| STIHL MSA 140 C-BQ-AK30-AL 101 36 B/5 Ач | 36 | 5 | 94 | 2.5 | от 28 754 до 33 095 |
| Worx WG384E. 9 0 коробка 40 В | 20 | 3 | 88 | 4.7 | от 15 783 до 18 847 |
| greenworks G24CS25 2.0Ah×1 24 B/2 Ач | 24 | 2.5 | 97 | 2.7 | от 4 899 до 5 552 |
Wheel and Axle
The wheel and axle are some of the most commonly used simple machines and have been in existence for several decades. Before its invention, there were so many transport limitations, especially when heavy goods were to be taken to longer distances. A wheel and axle is a simple machine with a wheel with a groove, with a rod running through it(axle).
In ancient times, it was used to fetch water from a well. It makes work easy by changing the distance over which force is applied. The wheel and the axles rotate simultaneously. This means that both will complete a rotation using the same time. Since the two have different radiuses, the distance they cover within the same time is different. This is what provides the mechanical advantage. A small amount of force is applied to the wheel, which is then transformed to a stronger force at the axle.
The wheel also reduces friction significantly when an object is being moved, making work easy. The innovation of the wheel and axle led to the construction of several objects such as carts and chariots, which made transport easy. Apart from reducing friction, a wheel and axle also multiply force. This means that when force is applied to the wheel, it is transmitted to the axle and is even much greater. A wheel and axle can work in two ways. These include:
- Force applied on the wheel
- Force applied on the axle
Examples of Lever Simple Machine
1. Nut Cracker
A nutcracker is a prominent example of a second-class lever simple machine. Here, the fulcrum is located at one end of the machine, and the load or the nut, in this case, is placed in the middle. The force required to break the nut is applied to the end that is present opposite to the fulcrum.


2. Seesaw
Seesaws demonstrate the working of a first-class lever simple machine in the simplest possible way. Here, the fulcrum is located in the middle of an iron rod. The child sitting on one end of the beam acts as a load, while the child sitting on the opposite end applies the necessary force to move the load.
3. Scissors
The pivot along which the complete structure of a pair of scissors moves is located in the middle. The load, i.e., the paper or cloth is placed between the blades of the scissors at one end, whereas the user exerts mechanical force to the opposite end. The applied force gets transferred to the load through the fulcrum or the pivot, thereby causing the deformation of the load. Hence, a pair of scissors act as a first-class lever simple machine.
4. Plier
In terms of working, a plier is very much similar to that of a pair of scissors. It is yet another example of a first-class lever machine where the force is applied at one end, the load is placed at the opposite end, and the balance point is present in the middle.
5. Stapler
The balance point or the fulcrum of a stapler is present at one edge, whereas the force is applied to the opposite end. The load or the sheets of paper are placed in the middle. Hence, a stapler is a classic example of second-class lever simple machines.
6. Wheelbarrow
A wheelbarrow consists of a metallic container that is attached with handles at one end and a wheel at the other end. Here, the wheel acts as a fulcrum or the balance point, the load is placed in the middle, and the push force is applied to the handles. Therefore, the arrangement forms a second-class lever simple machine.
7. Human body
Various joints in the human body function on the basic principle of a lever simple machine. These body parts include the elbow joint, Achilles tendon, the joint between hummers and radius-ulna, the joint between the skull and the atlas vertebrae, etc.
8. Broom
When a broom is used for sweeping dirt, it acts as a third-class lever simple machine. This is because the load is present at the one end of the broom, i.e., on the brush side, the effort or the force is applied in the middle, and the pivot is located at the top.
9. Hammer
Hammer is yet another example of a third-class lever machine. The force is applied at the centre, the load or the reaction of the force is observed at the end, and the pivot is formed on the opposite end.
10. Balance Scale
A balance scale makes use of a pivot in the middle of a beam. On either side of the scale, containers are attached that are used to contain the standard and the unknown weights. This means that the fulcrum is present in the middle, whereas the load and effort are present on either side of the beam. Hence, a balance scale is one of the best examples of a first-class lever simple machine.